Sunday, May 16, 2010

Summer Mini Madness!

There are so many things I love about the Summer Mini Catalogue. To see what's in it, click on the link to the left to go to my Stampin' Up web site or click here .

The first thing I want to share with you today is another project using the Elements of Style stamp set. Can you tell I really, really like it? Here is what I used to make this:

Stamps: Elements of Style, Sincere Salutations
Paper: Sahara Sand, Old Olive, Rich Razzleberry
Ink: Close to Cocoa, Rich Razzleberry, So Saffron, Regal Rose, Old Olive, Mellow Moss, Sahara Sand
Accessories: Big Shot, Top Note Die, Square Lattice Textured Impressions Embossing Folder, markers, Aqua Painter, sponge, Wide Oval Punch, Large Oval Punch


And here is how I did it:
First, I stamped the big flower image from Elements of Style using Close to Cocoa ink on Sahara Sand cardstock. I then coloured it using my favourite watercolour technique and Stampin' Up markers. Then I ran it through the Big Shot using the Top Note Die. I trimmed it following the line of perforations left by the die. I put it through the Big Shot again, this time using the Square Lattice Textured Impressions folder. Love the texture this creates! Using a sponge, I rubbed Sahara Sand ink all over it. This gives it even more texture and depth.


I mounted this image on Old Olive cardstock. Now, because I like to try to use every scrap, I took the cut-out left over from using the Top Note die, and placed it around the image. Because I had trimmed the image, this leaves a nice border of Old Olive showing through, and nothing gets wasted! This was then mounted on the card base of Rich Razzleberry.


The sentiment from Sincere Salutations was stamped on Sahara Sand using Rich Razzleberry ink and punched out with the Large Oval Punch. It was mounted on Rich Razzleberry punched out with the Wide Oval Punch. "Thinking of You" is a sentiment that could be used for many different occasions.


CASEing Shelli
I have been faithfully following the experiences of Shelli Gardner, co-founder and CEO of Stampin' Up, as she criss-crosses the continent conducting a series of Workshops of a Lifetime. Several demonstrators in Canada and the US won the privilege of having Shelli visit their homes and actually conduct a workshop! I can just imagine what an awesome event it would be, to watch Shelli do a workshop.


On her blog, So Shelli, she writes about each workshop and posts the projects for each one. They are always inspiring and amazingly simple yet striking at the same time. Perfect to do for Make 'n Takes. I just had to CASE this next project.


Here are the supplies used:
Stamps: Favourite Thoughts, Tropical Party
Paper: Whisper White, Taken With Teal, Island Oasis DSP
Ink: Old Olive
Accessories: 5-Petal Punch, Big Shot, Square Lattice Textured Impressions Embossing Folder, mat pack, paper pierceing tool, brad (non-SU)


This card was very quick and easy to make. In fact, I did several of them and used all of the stamps in the Favourite Thoughts stamp set. I had to make a couple of substitutions. Shelli had used Tempting Turquoise for her flowers, a colour I don't have but will be ordering soon, as the Taken With Teal that I used will be discontinued soon. I also didn't have yellow SU brad to use for the centre of the flower.

For the flowers, I ran a piece of cardstock through the Big Shot, using the Square Lattice Textured Impressions Embossing Folder and then punched out the flowers with the 5-Petal Punch.

The pattern from Island Oasis Designer Series Paper really lends itself to this design, as it is perfect for cutting in a strip.

I'm going to send one of these cards to each of my 5 sisters. If any of them are reading this, watch your mail closely!

If you like what you've seen here, there are many more great products in the Summer Mini Catalogue. Products can be ordered from this mini until August 31.

Thanks for stopping by and Have a Very Stamping Day!

Tuesday, May 11, 2010

Best Friends!

Just a very quick post before I go to work. I snapped this photo on Sunday. The mini-dachshund stretched across both pillows is my dog, Milo. The other one is Teller, who has been staying with us for a while. They are both the same age - 13. It's a good thing they like each other!

Sunday, May 2, 2010

Summer Mini Catalogue now available!

Just had to do another post tonight to let you know the new Summer Mini Catalogue is now available. Just click on the picture to go to my Stampin' Up web site, then click on Shop Now and you can view this catalogue as well as all the other current catalogues.

If you would like to book a workshop and earn free product and cool hostess gifts, contact me to set one up for you.

You can also order on-line through my Stampin' Up web site.

The first thing that caught my eye and that I just knew I had to have was the Elements of Style stamp set. It is gorgeous and has so many possibilites! Here is the very first card I created with this set. I can't claim it as an original design. It is a total CASE (Copy And Share Everything) of a card done by Heather Mills in the Shabby Chic style.


Stamps: Elements of Style, Teeny Tiny Wishes, Sanded Background Stamp
Paper: Pretty in Pink, Close to Cocoa, Sahara Sand
Ink: Sahara Sand, Close to Cocoa and markers in So Saffron, Old Olive, Pretty in Pink
Accessories: Aqua Painter, Very Vintage Brads, Scallop Border Punch, Word Window Punch, Very Vanilla Taffeta Ribbon, Linen Thread, Bone Folder, sponges
Technique: watercolouring, distressing, sponging

I stamped the flower image using Close to Cocoa Classic Ink on Sahara Sand cardstock. With the markers, I scribbled them on top of a plastic stamp case and picked up the colour with the Aqua Painter. This makes the colours very subtle, like watercolour painting. It's also easy to build up shading with this technique.

To do the distressing, I used the Bone Folder to rough up the edges and create the folds and tears. Using a sponge dauber, I dragged the Very Vanilla Taffeta Ribbon across the Sahara Sand ink pad to dirty it up a bit.

I love this look and this stamp set. Check back to see what else I've done with it!

Dogs and Stamping!

What a fun weekend! Yesterday I spent the day at a Fun Match with some friends from the Crowsnest Pass and Lundbreck. Judi ( http://sawhda.blogspot.com/ and http://shadowbarshepherds.blogspot.com/ ) was judging at the event which was held at Paws on the Run. I got to meet her new Shelty pup, Drummer Boy. He's only 19 weeks old (I think) but he sure is a bright and cheerful little guy and can already do some obedience and Rally. Here he is doing his down/stay.

What is a Fun Match you ask? It is a practice dog show. It's an opportunity for handlers and their dogs to do the same routine they would do at a dog show with a similar type of set up and a judge. It gives them an idea of what still needs to be worked on and what is working well.


Judi also brought two of her German shepherds, Swayze and Mesa.

My friend Sharlet brought her GSD Ryder, but for some reason I didn't get a picture of him yesterday! He is such a nice dog and has stayed at my house, along with Sharlet. He is a joy to have around and gets along very well with my mini-dachshund, Milo and my cat, Jack. This is a photo of Sharlet and Ryder that I took last November at the Lethbridge Dog Show.


And now for the stamping part!

I had the whole month of April to do the colour challenge issued by my upline, Lisa. Inspiration eluded me for the whole month. I finally started working on my project at 9 p.m. Friday night. I had to have it finished and posted by midnight! Made it just under the wire.


I decided to make a Flowerpot card. The challenge was to use So Saffron, Dusty Durango and Old Olive. For a neutral I went with Sahara Sand. I'm liking that colour a whole lot.


The ruffled flower was done by punching So Saffron and Dusty Durango cardstock with the Scallop Circle Punch. Ran them through the paper crimper many times and then crumpled and scrunched them until the layers pulled apart. Piled the layers on top of each other and held together with a brad.


For the other flowers I used various sizes of circle punches. Ran them through the crimper and scrunched then pulled layers apart. The So Saffron flower is held together by sewing a button from Button Latte on it using Linen Thread and a needle. The Dusty Durango flower is held together with a brad from Vintage Brads.

I stamped the Happy Mother's Day sentiment on Sahara Sand with Dusty Durango and punched out with the Word Window Punch. It's mounted on the Modern Label punched out of Old Olive.


For texture on the bottom of the pot, I stamped in Sahara Sand Classic Ink with the Sanded background stamp. The edge of the "rim" is done with the Eyelet Border Punch. I used Linen Thread to tie it around the Very Vanilla Taffeta ribbon.


And now I better get some of the chores done that I didn't do yesterday! But, I figure chores can always wait and I would rather spend time with friends I don't get to see very often. And of course, anything to do with dogs is too much for me to resist!

Thanks for stopping by!

Wednesday, April 21, 2010

What a month!

I hadn't planned to take this long a break between posts, but some kind of very tenacious virus got hold of me Easter weekend. Had to take a couple of days off work and had no energy for anything - even stamping! Finally starting to feel like I'm getting back to normal - whatever normal is!


We had a severe spring storm here last Wednesday with lots of heavy, heavy wet snow. Our power was off for many hours and I couldn't go to work (no power at the store), couldn't vacuum or do laundry, couldn't do any cooking (no coffee either!!). But I could stamp! So I made some more tulips using the Extra Large Two-Step Bird Punch from the Occasions Mini Catalogue. (Items in this mini are still available until April 30.)

Both cards were for people I work with. The first one is for a girl who says her favourite colour is black. So I thought there probably are black tulips somewhere! I sponged the edges of the tulips with Whisper White Craft Ink. The "grass" is made with Garden Green card stock punched with the Eyelet Border Punch and run through the crimper. I then used the Paper Snips to make the "blades" of grass. The Whisper White CS was run through the Big Shot using the Texturz Impressions and the bottom is punched with the Scallop Border Punch. The sentiment is from Teeny Tiny Wishes and stamped on Whisper White CS punched out with the Word Window Punch and mounted on Basic Black CS punched with the Modern Label Punch.


For the next card I went back to Perfect Plum, Rose Red and Summer Sun for the tulips. I just got the Bigz Clear Large Scallop Square die and punched it out using Whisper White CS. The recipient of this card is a fan of pink, so I used Rose Red for the base. The bottom of the Rose Red is stamped with the vine stamp from Vintage Vogue using Rose Red Classic Ink. The sentiment is from Sincere Salutations, stamped in Rose Red on Whisper White CS and punched out with the Large Oval Punch then mounted on Rose Red CS punched with the Scallop Oval Punch.
Ok, I think I have the tulip thing out of my system now! I have lots of new stamps and a new embossing folder to play with, so check back to see what I've been doing!


Sunday, March 28, 2010

Punch Fun


In my last post I showed you how to use the 2-step bird punch. This time I'll show you a variation by using just selected parts of the punch. I've seen this done on a few sites and loved the one done by Julia Bettancourt.

I used Perfect Plum, Summer Sun, Rose Red, Certainly Celery, Old Olive and Whisper White cardstock. The Whisper White CS was run through the Big Shot with the Perfect Details Texturz Plate. To change it up a bit, I then used the Top Note die on some of the embossed CS.

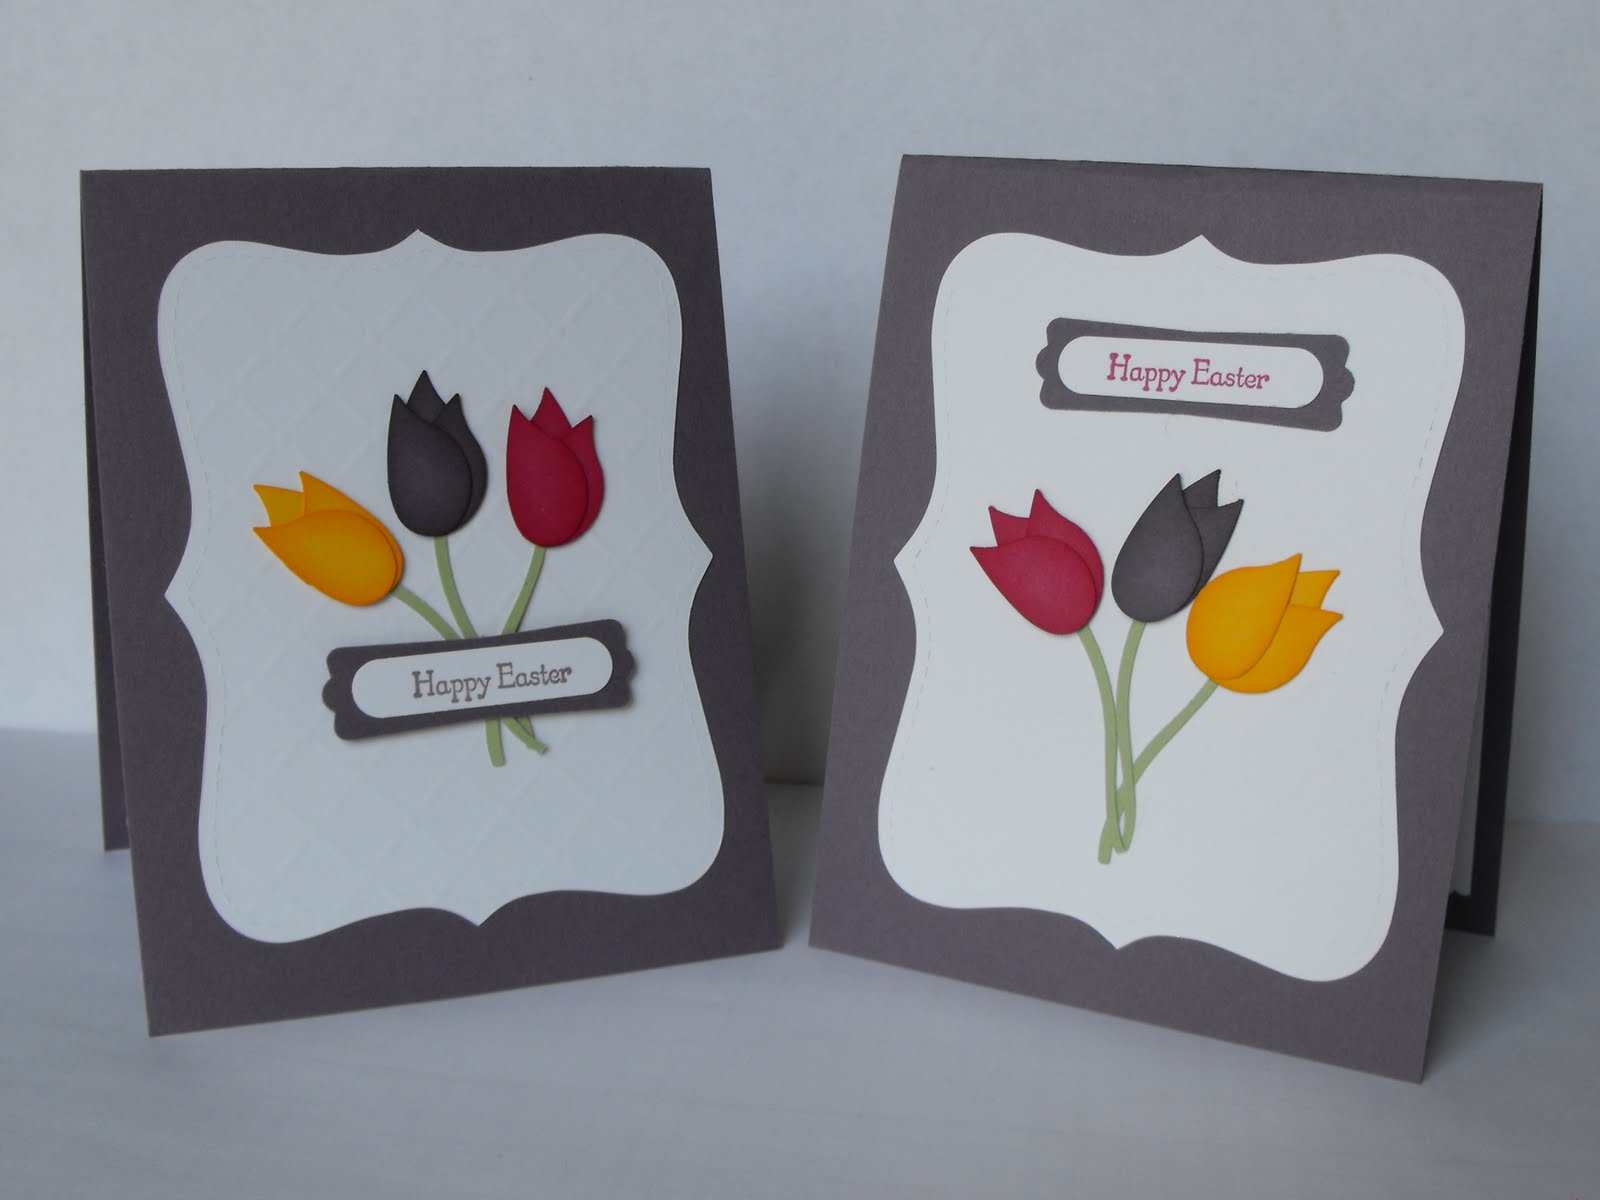
The tulips were made by punching only the wing part on the Two-Step Bird Punch. Each "petal" was then sponged with the corresponding ink. For the stems, I used Certainly Celery and just punched the branch part, leaving out the leaves.

On the sample not using the Top Note die, I was trying to think what to use in place of ribbon. There happened to be a scrap laying near-by of Old Olive CS that I had punched for another project, using the Eyelet Border punch and then ran through the crimper. So I picked it up and used the Paper Snips to cut into it to make it look like grass and placed it over the bottoms of the stems.

I thought these designs would be good to use as Easter cards and used the sentiment from Teeny Tiny Wishes - such a useful set! - stamped on Whisper White and punched with the Word Window Punch and then layered on the Perfect Plum CS punched with the Modern Label Punch.


Thursday, March 25, 2010


There are many things I love about Stampin' Up products. One of those things is the versatility of the punches. I love the Extra Large Two-Step Bird Punch. It's a new punch design that I find much easier to use and it also is easier to store. This punch is available until April 30 in the Occasions Mini Catalogue.


The punch has 3 elements: the bird body, the wing and a branch with leaves. In this first sample, I used it with both the bird part and the branch part and I paired it with the basket from the Basket & Blooms die for the Bigshot. Both of these are in the 2009 - 2010 Idea Book & Catalogue.


First I sponged clouds on Whisper White card stock. I used a torn sticky-note and sponged around it with Bashful Blue. Then I tore more sticky-notes and placed them across the bottom part of the card stock and sponged in the grassy area with Certainly Celery. The grass was stamped with the Inspired by Nature set in Garden Green.


For the basket I used Bella Bleu Designer Series Paper and trimmed down the sides. The edges were sponged with So Saffron. The bird's wing is also from the Bella Bleu DSP. I coloured the beak with a Pumpkin Pie marker and used a Basic Black marker for the eye.


The greeting is from Teeny Tiny Wishes and stamped in Garden Green on Whisper White, layered on So Saffron punched out with the Modern Label punch. I used Linen Thread to "hang" it from the bird's beak.

WWC211 - Kath's Feminine Anything Goes Challenge

https://watercoolerchallenges.blogspot.com/ It's a feminine theme this week from Kath. A perfect opportunity to play with my new butte...